Last Updated on May 28, 2023
A car owner needs to know many code languages to operate the car quickly. For this problem, the OBD2 scanner is mainly used to help you find the code easily. And the readers of this scanner are the code language. When you find the code U0151, you must know the problem is related to the communication with RCM or the restraints control module.
The detailed meaning and location of the trouble code U0151:
The code U0151 is a generic code. This code is used to diagnose communication systems’ trouble in most vehicle models or makes. This code mainly means the vehicle can’t communicate with the Restraint Control Module (RCM) with other types of control modules. And all these control modules attach to the Control area network or CAN bus system. Without the help of the CAN bus system, the control module can’t operate with each other. That means problems in any part of the CAN bus can create this type of trouble code.
If you are wondering where is this RCM located? Mainly this restraint control module is primarily found behind the dash. Usually, it is situated at the center of the car. This dash mainly receives the input data from different sensors and corrects data from many hardwired directly. Sometimes this module is also used to send data like it sent data over the CAN bus communication system. But the main problem with this trouble is that this code sometimes crashes or impacts the sensors. This input data allows the control module to determine the impact of your vehicle or the reason which slowed it down rapidly.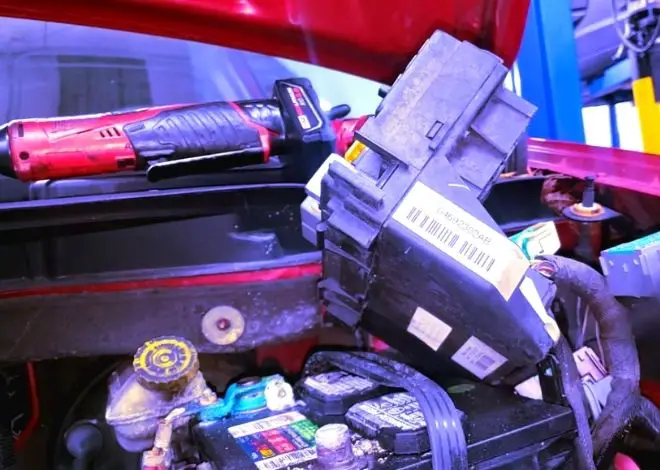
The main difference between the RCM sometimes takes no action. Sometimes it chooses the activated seatbelt pretensioners or activates pretensioners, which means passive restraints or airbags. But this trouble often occurs differently for various types or models of the vehicle, the number of wires, and the color of the cables in the control module system.
Symptoms of the Code U0151:
The trouble code U0151 is a savior issue for any car. It also creates safety issues in a nonfictional RCM or restraints controller system. Safety is the first thing for every driver every time. So this system can quickly notice that the warning light or malfunction indicator light is “ON.” That is why you need to always take this problem very seriously. This problem also comes with the airbag light on or rapidly flashing problem in the car.
The reason behind the code U0151:
There are many reasons behind the problem with the U0151 code. The leading cause of this problem is:
- Malfunction in Restraints Control Module or RCM.
- Open or short harness of the Restraints Control Module,
- The loose or damaged electrical connection in the Restraints Control module.
- Fault connection in the BCM/TIPM
- Malfunction module that sets the DTC.
- Occupant Restraint Controller (ORC).
- Malfunction in ORC power and ground.
How to diagnose and fix the trouble code U0151?
The easiest way to find the problem is to look at the Technical Service Bulletins or TSBs. Because this works like a manual book for every car, and you see everything in these TSBs. Many people also face this type of problem, and these features contain solutions with the details of the trouble. The TSBs not only save you time but also save money.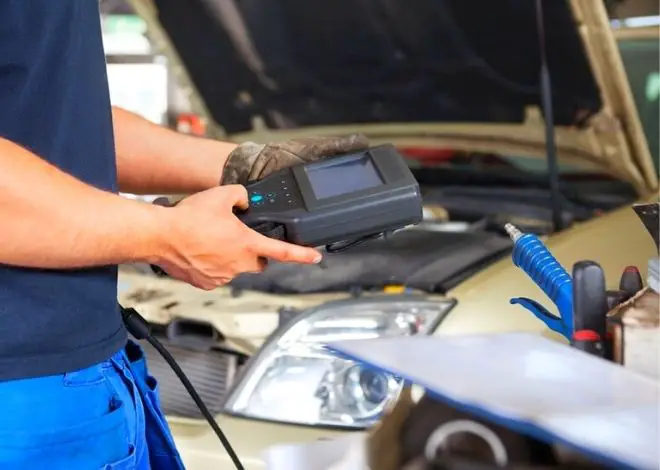
-
Step:01
First, check the DTCs. These DTCs are mainly related to tires, VIN, vehicle identification numbers, or batteries. So you need to check this first. Try to diagnose the problem; if you misdiagnose the problem, it will cost o more money with extra time. It would help if you had a scan tool to find the problem from DTC, and this code quickly finds out with this. And then, try to access the RCM, and when you get there, you can go through the memory code and find whether the problem is solved or still in there.
Sometimes the problem is related to the common failure of loss of power or ground of the RCM. So you also need to check the fuse supply of the RCM of your vehicle. Then locate the ground and check for any loose or damaged wires. If you point out the problem, try to repair this by clearing the wire. You need a wire bristle brush and baking soda or water to clean the wire, then clean the wire and connector or where it connects.
After doing any repair, clear the code from memory and restart the system. If the code pops up again, the problem is connected with RCM. If you don’t find the problem, then it’s restored itself.
-
Step:02
Now it’s time to check the connectors of the RCM, but make sure it’s turned off with the help of the manufacturer’s process. Sometimes it creates a problem with the airbag, so try to disconnect this sir bag for safety. Then check the connection of the CAN bus system. This bus system mainly also connected all the modules of the vehicle. But first, disconnect the negative battery cable. Then visually inspect the connectors and wiring. Then look for scratches, scuffs, exposed wires, melton plastic, or burn marks. Disconnect all the connectors and examine all the parts of the terminal. If you find burnt or green tint compression, then clean the terminals. Use any electrical contact cleaner and also a plastic brush. And after that, dry the place and apply the electrical grease where the corrosion took place.
-
Step:03
After that, if you face the problem again, you need some voltage check before plugging in all the connectors with RCM. You need a digital volt ohmmeter or DVOM. Then locate the RCM power and ground. The wiring diagram accesses and finds where the main power and ground are situated in the RCM. Reconnect the RCM with the battery and connect the red wire with the voltmeter to the battery, the voltage of the power source with RCM, and the black wire with the voltmeter to the ground. And then you can get the reading as a good reason. After that, connect the red wire from the voltmeter with the battery positive and the black wire with each ground.
Then again, you can see the battery voltage every time you plug the voltmeter into it. But before proceeding, check the wiring diagram and check both communication circuits in the RCM. Carry out the result you check related to your vehicle.
-
Step: 4
After that, check two communication circuits and find CAN C+ and CAN C- of the circuit. Then connect all the black voltmeter wires with the reliable ground and connect CAN C+ with the red wire. When you notice the engine’s key, you get 2.6 volts with slight fluctuations. Then vice versa, the connection, connecting the CAN C- with red wire, then finding the output. You can get 2.4 volts with sight fluctuations. Just like that, check the CAN B+ and CAN B- like before. Then you find 0.5 volts with slight fluctuation in the CAN B+. After that, you also get 4.4 volts and small fluctuations in the side of the CAN B-.
When you go through all the problems but still end up with the problem or are unable to remove the problem of U0151, you need a professional’s help.
Cost and seriousness:
For a technician, it takes about one hour to fix the problem. And the cost is also not much. You need bout 75$ to 100$ to repair the issue. And this problem is related to a control module. So try to fix the issue as soon as possible.
Kevin Nicholas is an automotive technician who is a genius at software and hardware-related issues. He manually tested more than a hundred OBD scanners and gave his honest opinion on whether the device was worth the money or not. His in-depth OBD review articles help people choose the right product, whether it is a European, American, or Asian vehicle. He completed his Automotive Specialized Training Course at Universal Technical Institute and has more than 15 years of experience in the field.