Last Updated on April 23, 2025
Obviously, the powertrain error codes are not good for the car as they exert when there is something wrong in the system of the vehicle. You may have encountered the trouble code P0052, and that’s why you are here to get the most straightforward solution to this issue. You do not need to worry, as, in this article, I will share almost all the aspects, including the fixing procedure of the error code P0052. So let’s get the thing started,
Possible Causes
- Faulty oxygen sensor heater
- Oxygen sensor heater circuit wiring or connectors are damaged or corroded
- The oxygen sensor heater control circuit is open or shorted
- Poor electrical connection in the oxygen sensor heater circuit
- Blown fuse related to the oxygen sensor heater circuit
- Engine Control Module (ECM) issues (less common)
Possible Solution
- Inspect oxygen sensor wiring and connectors for damage or corrosion.
- Test the oxygen sensor heater circuit for proper voltage and ground.
- Replace faulty oxygen sensor.
- Check for blown fuses related to the O2 sensor circuit.
- Test the oxygen sensor heater resistance; replace it if out of specification.
- Examine the engine control module (ECM) for any software updates.
- Ensure proper installation and seating of the oxygen sensor.
- Scan for other codes that might indicate a related issue.
- Consult a vehicle-specific repair manual for a detailed diagnostic procedure.
- If all else fails, seek professional automotive diagnostic help.
What does the P0052 code denote?
Almost all the error codes are terrible for the health of the car, and the trouble code P0052 is not an exception. This code is mainly illuminated if the oxygen sensor heater is damaged for any reason. This error code stands for “HO2S Heater Circuit High Voltage Bank 2 and Sensor 1.” This Code is solely related to the oxygen sensor heater. And it is a matter of great concern that this code can cause irreparable harm to the main engine of the car.
Bank 2 refers to cylinder number 2, and sensor 1 is for the frontier sensor of the catalytic converter. The check engine light begins to illuminate as long as the PCM sneaks something wrong in the car parts. The oxygen sensor may face varieties of problems like leakage problems, fluid leakage issues, damaged wirings and faulty connectors, and many more issues. Each part of the vehicle is associated with the PCM, as all the parts send notifications to the PCM, and it coordinates everything according to the message. The oxygen heater module works at an optimum temperature, and if it is not up to the mark, the sensors fail to operate. Sometimes, special types of coolant and liquid are used to support the system. That is what the code denotes, and if you understand the whole process, it won’t be difficult to curb the problem.
Short overview: Oxygen Sensor Heater Control Circuit
The oxygen sensor is one of the main parts of the engine of the car. The fully digitalized or computerized engine control module (ECM) systems depend on inputs from various sensors to administrate the engine performance. Smooth fume emissions and other significant functionalities may be hampered due to the failure of the oxygen sensor. The sensors need to provide accurate and exact information, or they may face acute driveability problems, fuel consumption faces skyrocketing situations, and emission failures can happen. The Oxygen Sensor is considered one of the prime sensors in the vehicle system. It may be denoted as the H2O2 for Heated Oxygen Sensor as it has an internal heater circuit to heat the sensor up to optimum temperature. 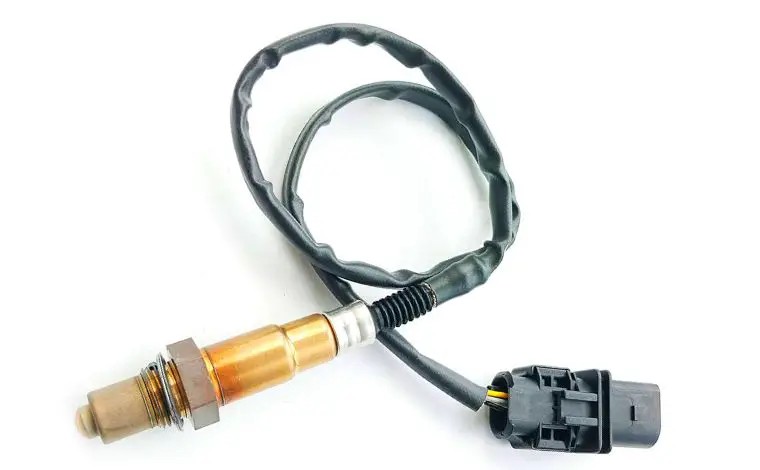
How does an oxygen sensor work?
The oxygen sensor is a self-sufficient system that can generate its own voltage, and it never gets out of voltage until it has been hampered. But there is a precondition for smoothly working the sensor; the sensor needs a standard temperature. If the sensor is cold, then it will stumble during working. There is a zirconium ceramic bulb that is situated in the exhaust manifold. The main working mechanism of the bulb is that it is used to serve the electrode. This bulb has a porous layer of platinum which is mostly used for supporting the yielding of the voltage.
The exterior of the bulb faces the warm gasses in the exhaust as the interior of the bulb is vented disguised through the body of the sensor to the outside ambiance. An ancient type of oxygen sensor more or less possesses a small hole in the body shell so necessary air can get into the sensor, but the latest oxygen sensors evade through the wire connectors and circuits. They have no vent hole, but the minuscule amount of gap between the insulation and wire gives enough room for air to infiltrate into the sensor; you should never apply grease to the oxygen sensors as it thwarts the natural flow of the air.
Some other factors that can hamper the oxygen sensor are contaminated water and dirt pollution and rust in the main steel exterior body of the oxygen sensor. There is a significant difference between the inside oxygen and the outside air, and if this difference gets increased, then the voltage also fluctuates seemingly. When the air-fuel ratio is higher, the voltage fluctuates between 0.7 to 0.9 volts, and in case the air-fuel mixture ratio is poor, then the sensor may yield not more than 0.2 volts. A decently balanced air-fuel mix can yield a voltage of 0.45 volts.
The oxygen sensor should be warm, like 600 degrees, so that it can operate relentlessly. Before the sensor starts producing a strong voltage signal, many oxygen sensors have a tiny heating factor inside them to support them in quickly reaching the standard optimum temperature. The heating factor can impede the sensor from cooling off during a long idling period. This will accelerate the system to revert to open the loop, and the warm oxygen sensors are exhausted almost in the latest vehicles that traditionally contain 3 or 4 wires. The ancient single wire oxygen sensors do not possess these amazing types of heaters.
Inspection strategy: Oxygen Sensor Heater Control Circuit
It is necessary to know the ins and outs of the heated oxygen sensors; if you feel that there is something not right in the oxygen sensor, you can check it by yourself. For the convenience of the readers, I will share the complete inspection process of the Oxygen Sensor Heater Control Circuit step by step,
Examine the air-fuel ratio sensor
The air-fuel mix is one of the most important factors in the main engine constituents. For the inspection of the heater resistance, you need to disconnect the B33, B48, and the A/F sensor connector. Then you need to measure the actual resistance of the connectors and the sensors. The standard resistance of the sensor may be calculated between 1.8 to 3.4 ohm for the bank1, and the specified condition is nearly 20 degrees Celsius. For bank 2, the measurement is also the same. After you get all the calculations, you have to reconnect the sensor connector. Replace the air-fuel ratio sensor if it is defective. 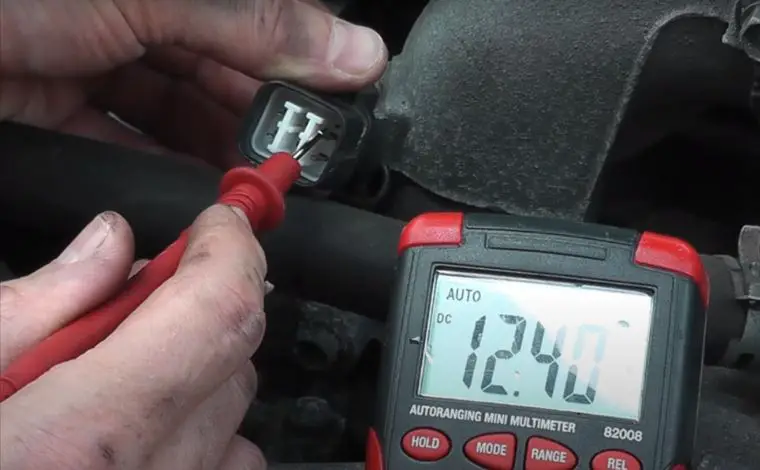
Scrutinizing the Terminal voltage
It would be best to examine the Sides of the Wire Harness here. Then disconnect both of the sensor connectors. Then turn on the ignition switch and see if the engine is responding or not. Calculate the voltages between the B33 or B48 A/F sensor connector terminals’ terminals. The specified condition for the sensor and connectors is between 9 to 14 volts. Then reconnect the sensors of both terminals.
Check integration relay
There are a total of two sides in the integration relay, and they are the Integration Relay and the Connector Side. Here you have to remove the integration relay from engine room number 1, and the relay block needs to be examined really carefully for the further convenience of the sensor and the connections. 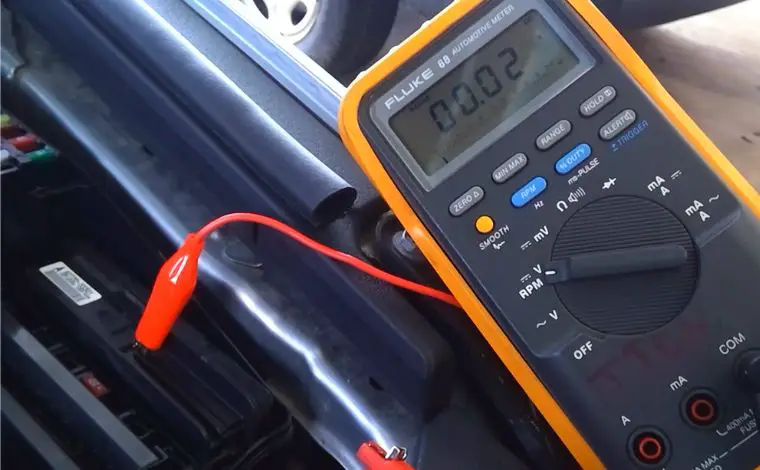
Inspecting the A/F fuse with the help of the multimeter
The very first step is to remove the A/F fuse from the particular relay. Apply a smart multimeter for a better result. Calculate the actual resistance of the sensor, and the standard resistance fluctuates between 8 to 10-kilo ohm. After you have measured all the resistance, you need to reconnect the A/F fuse. If this does not work, then it is time for the replacement of the integration relay.
Check the sensors and wirings.
Bank 2 is solely affected when the error code P0052 is illustrated in the OBD2 scanner. One of the main causes of the illumination of this code is the faults in the sensors, and the circuits and a damaged wiring system can internally harm the entire circumstances of the main engine of the car. Here is how you can examine the wire harness,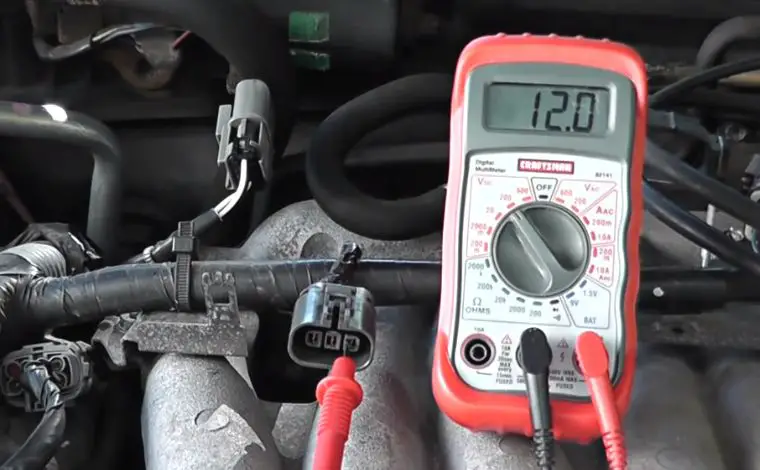
Check the EFI NO. 2 fuse and then Disconnect the B33 or B48 A/F sensor connector. Disconnect the integration relay from the engine room No. 1 relay block and finally measure the resistance for different purposes. In most cases, the resistance consists of between 8 to 10 ohms or higher than 10 ohms in some exceptional cases. Then you have to reconnect the A/F sensor connector and Reinstall the integration relay. Repair or replace harness and connector if there are any types of disintegration.
Examine wiring harness
The wiring harness is one of the main components of the oxygen sensor. If this portion is corrupted, then the overall system of the wiring harness is destroyed within a few days. For examining the wiring harness, you need to disconnect the particular B33 or B48 A/F sensor connector and then disconnect the connector of the ECM. Then introduce a multimeter and check the particular resistance of the wiring harness. If the resistance meets the standard value given in the manual, then everything is okay. If there is any fault in the resistance, then replace the harness as soon as possible.
Check the DTC outputs.
The diagnosis trouble code outputs must be compatible with the OBD2 scanner. If it produces wrong information, then you won’t be able to find out the real location where the fault occurs. Connect the particular intelligent tester to the DLC3 and then turn on the ignition switch and also on the tester in case of getting the actual measurement of the DTC outputs. Clear the codes that are produced on the screen of the scanner. You must have to find the delete option in the scanner and press that button to disappear the code manually. Allow the engine to rest or be idle for some minutes, and start the engine again.
Then again, check for the codes if they are pertaining to the vehicle. Find any kinds of intermittent problems and address them with proper professionalism. If you fail to find out the fault coder, then take help from the user’s manual guide. That should meet the purpose of eliminating the error code. Replace the ECM if needed.
What Are the Prime Causes of the P0052 Trouble Code?
There are tons of causes of the error code, and they are described below with the help of some relevant points,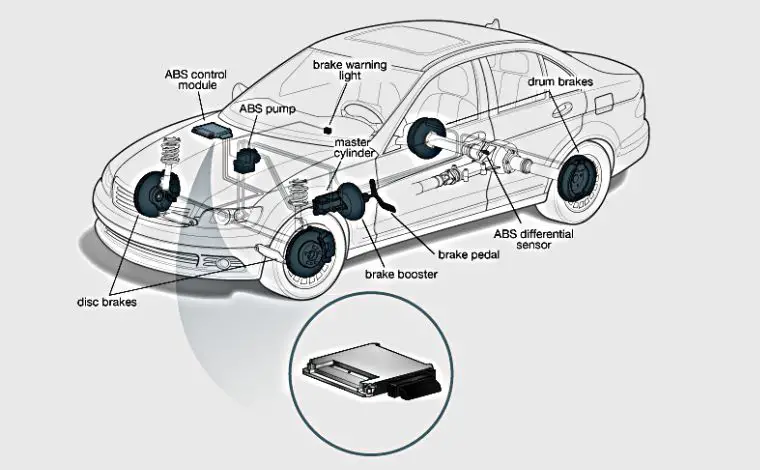
- The defective oxygen heater can cause the error code P0052
- The power supply, ground station, and the other terminals may be facing any disguise Errors.
- The sensors may be out of order or may have worn out due to the wet atmosphere in the oxygen chamber.
- The powertrain control module may have been damaged or can not read the particular error codes.
- The Bank 2 Sensor 1 may have been facing any types of irregularities. The oxygen sensor heater may face failure due to some unknown causes. The ECM sometimes showcases some unusual types of issues that cause the error code P0052
- The exhaust of the oxygen sensor may be leaking, or the fuel pressure may not be up to the mark. Excessive fuel pressure sometimes disrupts the natural operating system of the oxygen sensor.
- Check the viscosity of the oil as the incompatible oil may cause the worst harm to the main engine.
- Sometimes the unmetered oxygen enters the oxygen’s main chamber, which is not good for the air-fuel proportion. And if the air-fuel proportion is not up to the mark, the overall system might collapse badly.
- There are many types of terminals in the oxygen chamber like the ground terminal, base terminal, and working terminal. Any kind of irregularities in these terminals may cause irreparable harm to the main engine. And eventually, it causes the trouble code P0052 in the procedure.
What are the Common Symptoms of the P0052 Code?
You may not have known the actual symptoms of the error code P0052, so you might be in the position of finding out if the code is to happen very soon. An illustration of these symptoms can make you aware of the code; let us see those common symptoms in detail, 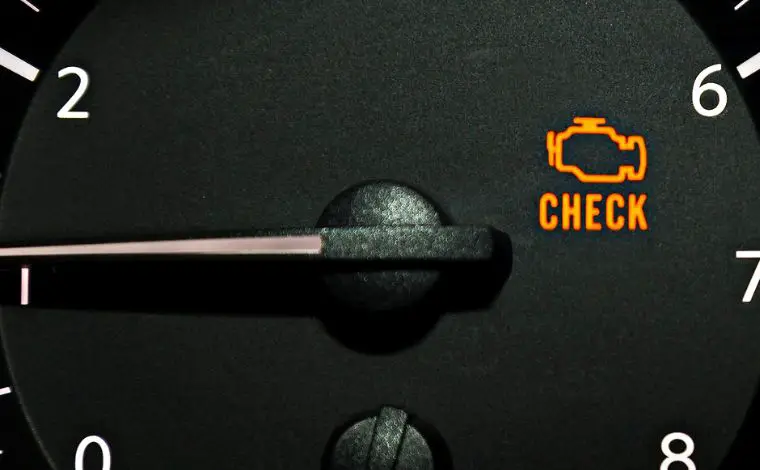
- The most common symptom is the illumination of the MIL( Malfunction indicator light) or the CEL(Check Engine Light). The PCM collects the fault notification from the oxygen sensor, and then it works according to the message. The PCM then ordered the check engine light to illuminate, and the user came to know that there was something fishy in the main engine chamber.
- The engine performance may have been hampered due to low fuel level or due to the use of the wrong viscosity oil.
- The lean performance of the air-fuel mix or the excessive difference between the actual oxygen present in the chamber and the exterior oxygen amount.
- The exhaust pipe may have been producing black and white smoke that is not good for the health of the main engine.
- Irregular stalling of the car or the car may showcase stumbling while starting. The oil control valve may have some sort of sludge, and the excessive sludge and dirt block the filter. These can also affect the performance of the engine.
- In some cases, there may not be some clear illumination of the symptoms of the error code P0052, but problems still happen.
How to Diagnose the P0052 Code?
The diagnosis procedure of the error code is very extensive, and you have to maintain the hierarchical order to diminish the code successfully. Let us see the diagnosis process by dividing the diagnosis process into some effective steps,
- Stage-1
The very first step includes checking the wirings and the connectors. You may find a total of four wires in the oxygen chamber. Two of them connect directly to the main connectors, and the rest of the two are connected to the ground and powering sensor. Introduce the multimeter and the voltmeter to check the wirings’ resistance and voltage. Compare the values with the user’s manual guide. If they are not harmonious with those values, you need to fix the wirings and circuits. To measure the resistance and the voltage, you must connect the terminals with the red and the black wires. Generally, the red wires are for the positive side, and the black wires determine the negative side of the battery. Normally the standard voltage for the battery is 12.6 volts; if the value exceeds the standard value, then repair or replace the wirings and the battery.
- Stage-2
Diagnose the oxygen sensors if they are operating in a decent manner. Check the signals and the notifications of the PCM. It may help you understand the real scenario of the oxygen sensors. Check the power and ground station if they are smoothly operating, and check the sensor heating element. The main duty of the heating element is to create a standard temperature for the smooth operation of the oxygen sensor as it can not work efficiently in a cold temperature. You can also examine the wiring diagram of the car to know the actual circuit operation of one oxygen chamber.
- Stage-3
Visual inspection is pretty much necessary for the diagnosis process of the error code P0052. In some cases, the mechanics do not perform the visual inspection and just refer to the replacement of the parts. This increases the overall burden on the car owner. So visually inspect the wirings, connectors, timing components, and the other sensors situated in the oxygen chamber. You can also give a visual check by yourself in the home before taking the vehicle to the auto garage. Inspect the freeze frame data to understand the code in a detailed manner.
- Stage-4
Always take a test drive of the car and try to eliminate the code manually by pressing the delete option in the OBD2 scanner. Check all the gears, camshaft rotation data, live stream data, and all the oxygen control chamber connections. Finally, check the PCM and the car’s ignition to see if they are performing correctly.
Common mistakes when diagnosing the P0052 code
To err is in human beings. No matter how a professional inspect your car, it is obvious that she or he can make silly mistakes. The error code P0052 is a special code type related to the oxygen heater sensors. Here are some of the common mistakes that can occur while diagnosing the error code P0052,
- The mechanic sometimes completely forgets to check the faulty parts visually, and he directly suggests you replace the parts without any further considerations.
- The level of fuel in the engine is very much crucial for the flawless operation of the car. If you ignore checking the fuel level and the viscosity, it will be disastrous for the vehicle.
- The heating element and the heater circuit need to be examined decently as these Are the main elements that are responsible for the smooth functioning of the oxygen chamber.
- Sometimes the professionals misunderstand the error codes and fail to locate the exact location where the fault occurred. Besides these, there are tons of other mistakes that may happen. A vigilant inspection is necessary for eradicating those mistakes.
How harmful is the P0052 code?
If not addressed early, the error code P0052 can cause irreparable harm to the car. Initially, this code does not seem to be that dangerous, but actually, it can wreak havoc in an unidentified manner. This trouble code can,
- Permanently disable the main system of the heated oxygen sensor. The air-fuel mix proportion may be affected badly, ultimately affecting the gear’s flawless shifting. And if any cause harms the shifting of the gear, the car might face stalemate during driving, or the starting of the car may be stumbled.
- The trouble code can internally damage the wire needs and the connectors and may affect the resistance, voltage, and terminals. Unjustified values of the voltage or shortage of the voltage may disable the main engine system of the vehicle.
How to replace the Oxygen Sensor?
As the error code P0052 is mainly related to the oxygen sensor, it must have been replaced for a better result. And here is the total replacement procedure described in a hierarchical order of stages,
The defective oxygen must be replaced immediately, and there are some benefits of replacing the oxygen sensor periodically for preventative maintenance. To replace the oxygen sensor, you have to remove the oxygen sensor from the exhaust manifold. Apply a special kind of oxygen sensor socket of 22mm. Make sure that the sensor is warm. Otherwise, it won’t pull out from the place. Try to fix the sensor in the sockets while it is warm and turn it counterclockwise to adjust firmly. Then replace the old sensor with a brand new one. That’s how you can easily replace the oxygen sensor.
How to Fix the P0052 OBD2 Code?
After all these discussions, the time has come to elaborate on the fixing procedures of the trouble code P0052. This process is comparatively a complex one, so we will discuss the full policy under individual headings,
Register the code
The first step of troubleshooting the error code P0052 is to register and freeze-frame the code for having a detailed view. Connect the OBD2 scanner and find out the code. At first, try to eliminate the code by taking a simple test drive manually. If the short test drive can eliminate the code, then follow the further steps.
Repair the wirings and sensors
The most vulnerable parts in the oxygen chamber are the sensors and the electrical wirings. The wirings may face short circuit, rust and bent at any end of the wires, or may have been corroded. These factors impede the natural functioning of the sensors. To repair the faulty sensors or replace them with the latest one.
Fix the voltage and resistance
After the sensors, the most vulnerable parts are the voltage and resistance of the heated oxygen sensor. There may be some voltage problems due to an insufficient supply of power. The terminals may be corroded, resulting in an uneven resistance. If the voltage metering is not satisfying, change the respective battery parts to fix the problem.
Measure the live data and fix them
You may obtain some of the live data from the scanner. These data carry information about the faulty parts. The live data gives the true sense of the error, and it also provides detailed information about the oxygen sensors and the wirings. After figuring out, freeze frame data, inspect the fault location, and fix them.
Repair the PCM
The PCM is the main commanding part of a vehicle engine. If it is interrupted, then no other parts can operate. Sometimes the PCM software is outdated, and it needs an upgrade. So update the PCM algorithms and fix the OBD2 scanner. It is producing some incompatible data. 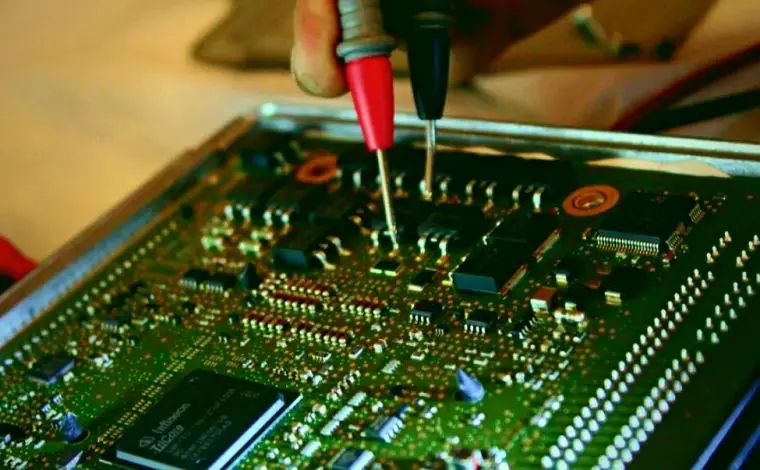
Repairing cost of fixing the P0052 code
The replacement cost varies according to factors like the mechanic’s expertise level, the rate of the parts, and the locational factors. The auto garage charge 70$ to 150$ for repairing the trouble code P0052. In some cases, the cost may rise if any major parts of the oxygen sensor are out of order.
Other codes similar to DTC P0052
There are lots of codes that are almost similar to DTC P0052. Here are the respective codes that are harmonious to this code,
P0030 this powertrain code refers to the “HO2S Heater Control Circuit (Bank 1 Sensor 1).”
P0031 means the “HO2S Heater Control Circuit Low (Bank 1 Sensor 1).”
P0032 this code determines the “HO2S Heater Control Circuit High (Bank 1 Sensor 1).”
It can include thousands of similar codes. Still, it is not obvious that each of them is related to the DTC P0052, but the codes that are mentioned above are more or less similar to this code. You can follow this article to resolve the other related codes; at least you can gain the basic knowledge about repairing the harmonious codes.
Final words
If you own a car, it is a common chore to face the trouble codes if you own a car. These codes are not only annoying but also expensive to eradicate. But if you want to save some of your pence, then try to solve the issues at home. And if you are baffled about how to troubleshoot the code at home, you can undoubtedly rely on this article. By following the complete procedure and the sequences of the repairing process, you can hopefully solve the problem. Contact us for any further support.
Kevin Nicholas is an automotive technician who is a genius at software and hardware-related issues. He manually tested more than a hundred OBD scanners and gave his honest opinion on whether the device was worth the money or not. His in-depth OBD review articles help people choose the right product, whether it is a European, American, or Asian vehicle. He completed his Automotive Specialized Training Course at Universal Technical Institute and has more than 15 years of experience in the field.