Last Updated on April 22, 2025
Modern vehicles come equipped with smart technology to monitor their systems and alert drivers when something goes wrong. The On-Board Diagnostics system, commonly known as OBD, plays a vital role in this process. Introduced in the mid-1990s, OBD2 became a mandatory feature in most cars manufactured after 1996. It works by monitoring the car’s systems and triggering a warning light—most notably, the Check Engine Light (CEL)—when a malfunction is detected.
While many people rely on a diagnostic scanner to read and clear these error codes, not everyone has access to an OBD2 scanner. This raises an important question: Can you clear OBD2 codes without a scanner? The short answer is yes, and this guide will walk you through how to do it safely and correctly.
Understanding OBD2: What Does It Do?
Before we jump into the methods, it’s essential to understand what the OBD2 system is and why it matters. OBD2 stands for On-Board Diagnostics, version 2, and it acts like a communication bridge between your vehicle’s internal systems and diagnostic tools. The car’s Electronic Control Unit (ECU) constantly checks systems like the engine, transmission, fuel injection, and emission controls. If a fault is detected, a code is stored in memory and the Check Engine Light is activated.
Each code points to a specific issue—ranging from minor to critical. Using a scanner, you can read these codes and understand what needs attention. However, without a scanner, you’re left relying on manual methods to clear the codes.
Can You Really Clear OBD2 Codes Without a Scanner?
Yes, you can. Although it’s always preferable to read the code first (to understand the problem), you can still reset the system and clear the warning light without one—if the issue has been resolved or was a temporary glitch.
This method essentially involves disconnecting the battery to reset the ECU, erasing the stored trouble codes in the process. But this isn’t foolproof: if the problem is still present, the light will come back on once the system rechecks itself.
Quick Reset Method: No Scanner Needed
If you’re in a hurry, here’s a fast overview of the steps to follow:
- Turn off the engine and park your car safely.
- Disconnect the negative terminal of the battery.
- Wait for 10 to 15 minutes to drain the system power.
- Reconnect the battery.
- Start the engine and check if the Check Engine Light (CEL) has turned off.
In-Depth Guide: How to Clear OBD2 Codes Without a Scanner
Let’s now explore each step in detail so you can confidently do this yourself—even with no technical experience.
1. Park Your Car in a Safe and Level Area
Your safety is the top priority. Before you begin, make sure to park your vehicle in a flat, secure area. Apply the parking brake, turn off the ignition, and remove the key. If possible, wear gloves and safety glasses, especially when working near the battery.
2. Open the Hood and Locate the Battery
Pull the hood release lever inside your car, and then lift the hood using the external latch. Use the hood prop rod if needed. Now locate the battery—usually on the left or right side of the engine bay.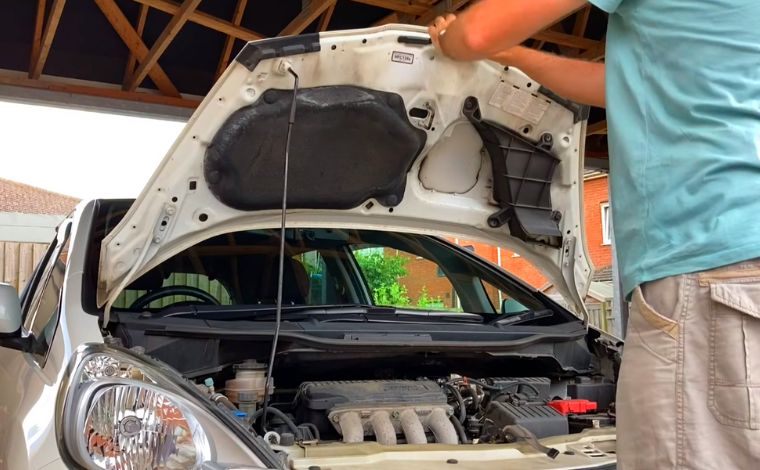
3. Identify the Battery Terminals
The battery has two terminals:
- Positive terminal (+): Typically marked in red.
- Negative terminal (–): Usually marked in black.
For this process, you’ll begin by disconnecting the negative terminal to cut off the power supply.
4. Disconnect the Negative Terminal First
Using a wrench or socket set, loosen the nut on the negative terminal. Slide the cable off the terminal and place it aside, making sure it doesn’t come in contact with the battery or any metal surface.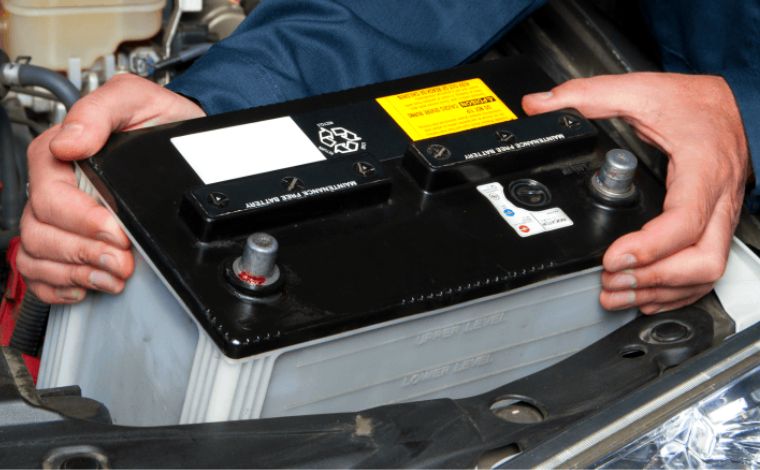
Repeat the process for the positive terminal afterward. This ensures complete disconnection of electrical flow to the vehicle’s systems.
⚠️ Warning: Always disconnect the negative cable first to avoid short circuits or sparks.
5. Loosen Terminal Caps Gently
Some car batteries have protective caps over the terminals. If your battery has them, just loosen (not remove) them gently using your hands or a simple wrench—no need for aggressive tools.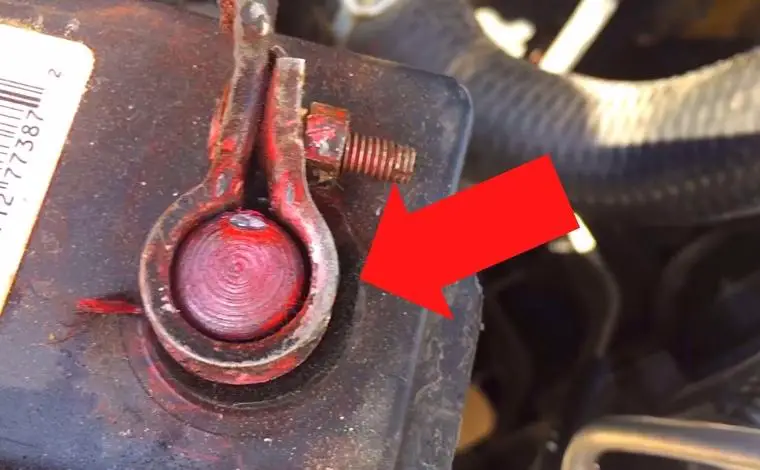
6. Cycle the Ignition Key (Without Starting the Engine)
Insert your key into the ignition and turn it to the “ON” position (without starting the engine), then switch it back to “OFF”. Do this three to five times. This helps clear remaining stored energy and signals in the system.
It’s a small but effective step in making sure the ECU resets fully after battery disconnection.
7. Drain Residual Power from the System
Even after disconnecting the battery, some energy may remain in the ECU’s capacitors. To discharge it:
- Press and hold the brake pedal for 10–15 seconds
- Turn on your headlights (if still functional) to help drain power
This process ensures no voltage remains in the system and helps wipe any lingering temporary codes.
8. Wait for 10–15 Minutes
Let the vehicle sit for at least 10 to 15 minutes. This pause gives time for all systems to shut down completely and the ECU memory to reset. In newer vehicles, this waiting period is especially important due to more complex control modules.
9. Reconnect the Battery Terminals (Positive First)
Start by reconnecting the positive terminal, tightening it securely. Then reattach the negative terminal and ensure both cables are tightly fastened. Loose terminals can cause voltage fluctuations or prevent the ECU from properly resetting.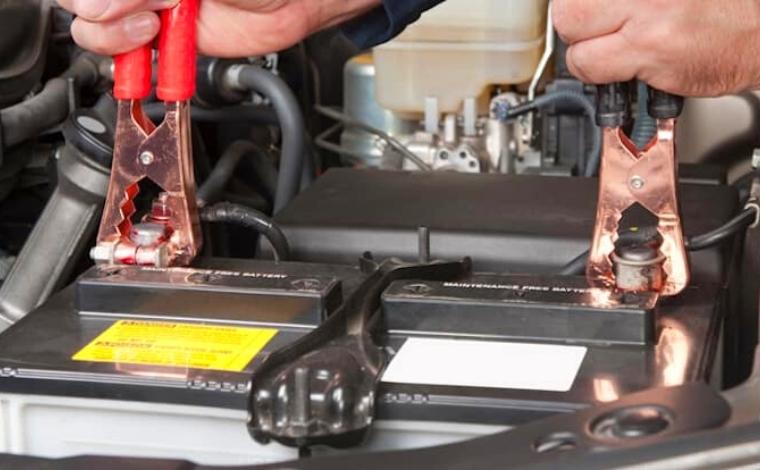
10. Start the Engine and Monitor the Dashboard
Now, insert the key and start your car. Observe the dashboard lights—particularly the Check Engine Light. If the code was temporary and successfully cleared, the light should be off.
If it turns back on, that means the issue is still present and the ECU has detected it again. In that case, a proper diagnostic scan is required to determine the exact cause.
Important: Know When This Method Works (and Doesn’t)
✅ This method works if:
- The issue was temporary (e.g., loose gas cap, low battery voltage)
- You’ve already fixed the problem and now want to clear the code
- The system needs a soft reset due to a glitch
❌ It doesn’t work if:
- The issue is persistent and hasn’t been resolved
- Your vehicle uses a permanent trouble code (which can’t be cleared without a scan tool)
- You’re dealing with emission-related codes in newer cars
💡 Pro Tip: Always check if your gas cap is loose or missing—this is one of the most common causes of a Check Engine Light.
Is It Safe to Clear Codes This Way?
Yes, it’s generally safe to reset codes using the battery method. However, keep in mind:
- It will also reset your radio presets, clock, trip meter, and possibly other settings
- Some cars may require radio security codes to function again
- On certain models, disconnecting the battery may trigger anti-theft systems
What to Do If the Check Engine Light Turns On Again
If your check engine light reappears after you’ve cleared the OBD2 codes without a scanner, it usually means the root problem hasn’t been fully resolved or the ECU (Engine Control Unit) wasn’t properly reset. In such cases, don’t panic.
First, retrace the steps you took to reset the ECU. If you disconnected the battery to clear codes, ensure you left it disconnected long enough (typically 15–30 minutes) and that you drained all residual power by pressing the brake pedal or turning on the headlights. If the engine light comes back on, it indicates that the ECU still detects a fault.
This often happens when:
- The vehicle has a persistent or intermittent issue.
- The ECU wasn’t fully drained.
- You’ve cleared the code but not addressed the actual mechanical/electrical fault.
Solution:
Repeat the ECU reset process from the beginning. This time, double-check all connections, perform a thorough inspection of the engine components, and if possible, consider using an OBD2 scanner to confirm the trouble code and pinpoint the issue.
Common Problems After Resetting Codes Without a Scanner
While clearing OBD2 codes without a scanner is a viable method, it comes with some inconveniences you should be aware of:
1. Loss of Saved Settings
When you disconnect the car battery to reset the ECU, your vehicle’s electronic system essentially reboots. This means you may lose:
- Radio presets
- Clock settings
- Driver memory settings
- Trip mileage or driving modes
Although not critical, reconfiguring these settings can be time-consuming and annoying.
2. Readiness Monitors Are Reset
Another important consequence is that the vehicle’s readiness monitors (used during emissions testing) are also cleared. If you go for a vehicle inspection right after resetting the ECU, your car might fail because the onboard diagnostics haven’t run all self-checks yet.
3. The Problem May Still Exist
Resetting or clearing the codes does not resolve the issue—it only hides the warning. If there is an underlying problem with the sensor, fuel system, or ignition system, the check engine light will likely return. This is why it’s crucial to identify and fix the root cause, not just erase the symptom.
The Best Way to Remove OBD2 Codes: Use a Scanner
Although it’s possible to clear codes manually, using an OBD2 scanner remains the most effective and safest way. A scanner not only reads and clears trouble codes but also helps you identify the problem instantly, saving time and preventing further damage to your vehicle.
Why Use a Scanner?
- Accurate Diagnostics: It shows real-time data and specific fault codes.
- Saves Time: You don’t need to guess what’s wrong.
- Safe for Modern Vehicles: Reduces the risk of affecting sensitive systems by improperly resetting them.
How to Clear OBD2 Codes Using a Scanner (Step-by-Step)
Step 1: Get a Reliable OBD2 Scanner
Purchase a compatible OBD2 scanner. Both wired and wireless (Bluetooth/Wi-Fi) models are widely available. Some good brands include Autel, Innova, and BlueDriver.
Step 2: Locate the OBD2 Port
The OBD2 port is usually located under the dashboard on the driver’s side, just beneath the steering wheel. Plug the scanner into this port securely.
Step 3: Turn On the Ignition
Switch the ignition to the “ON” position, but don’t start the engine. This powers up the vehicle’s computer and enables communication with the scanner.
Step 4: Press the “Read” Button
Allow the scanner to scan your vehicle’s ECU. After a few moments, it will display any stored trouble codes on the screen.
Step 5: Diagnose the Issue
Refer to the code definitions provided by the scanner or check the code online. Determine which component (e.g., oxygen sensor, throttle body, ignition coil) needs attention.
Step 6: Perform Repairs or Replace Faulty Parts
If the scanner shows a faulty sensor or part, repair or replace it. Don’t clear the code without addressing the actual issue, as the warning will return.
Step 7: Press the “Erase” Button
Once the repair is done, press the ERASE or CLEAR button on the scanner. This will remove the code from the system and turn off the check engine light.
Step 8: Turn Off the Ignition and Unplug the Scanner
Switch off the ignition, remove the scanner, and store it safely for future use.
Step 9: Drive the Vehicle for a Few Minutes
Allow the vehicle to warm up and run through a driving cycle. If the light stays off, the issue is resolved.
Frequently Asked Questions (FAQs)
Is Using a Scanner Better Than Manual Reset?
Yes. A scanner offers immediate diagnostic information, allowing you to target and fix the actual problem instead of guessing. It’s safer and more reliable, especially for modern vehicles with sensitive onboard electronics.
Why Is My Check Engine Light On But No Code Shows?
If your engine light is on but the scanner displays no codes, your scanner may be outdated or incompatible. Another possibility is that the issue is related to a non-OBD2 system (like ABS or SRS), which a basic scanner might not detect.
Can I Diagnose Trouble Codes Without a Scanner?
Some older cars (especially pre-1996 OBD1 models) allow code reading through dashboard light blinking or jumper wires. However, most modern vehicles require an OBD2 scanner for accurate code diagnosis.
How Long Do You Need to Disconnect the Battery to Reset ECU?
Typically, 15 to 30 minutes is enough. After disconnecting the battery, press the brake pedal for 20–30 seconds to drain residual power.
Will Resetting the ECU Harm My Vehicle?
No, but frequent resets without addressing the root issue may hide developing problems and lead to costly repairs later.
Conclusion
While clearing OBD2 codes without a scanner is possible—typically by disconnecting the battery—it’s not always the most effective or reliable approach. This method might reset the ECU, but unless you fix the underlying problem, the check engine light will eventually return.
The best way to diagnose and fix engine-related problems is by using a quality OBD2 scanner. It not only reads error codes but also helps you fix them precisely. Whether you choose a wired or wireless model, owning a scanner can save you money, time, and hassle in the long run.
For a complete guide on reading codes manually and choosing the best diagnostic tool, check out our full post:
👉 Best OBD2 Scanner Buying Guide
Kevin Nicholas is an automotive technician who is a genius at software and hardware-related issues. He manually tested more than a hundred OBD scanners and gave his honest opinion on whether the device was worth the money or not. His in-depth OBD review articles help people choose the right product, whether it is a European, American, or Asian vehicle. He completed his Automotive Specialized Training Course at Universal Technical Institute and has more than 15 years of experience in the field.